
Flying Sock Monkeys!
I love these guys with their button eyes. They were inspired by the Wizard of Oz but with a sock monkey flare. I hope you enjoy the pattern and if you need help there's a video tutorial to show you the way. Monkey is about 6.5 inches tall, not including the hat.
Supplies:
Feel free to use any yarn or color you'd like but if you want the same monkey as pictured then use Red Heart Comfort yarn. Body, limbs and wings in Turquoise 3185. The vest and hat in Peacock 3193 and the red is Red Heart Super Saver in Cherry. RH Comfort yarn is a 100% acrylic knitting worsted weight yarn. Please use google to research if the yarn you are using is comparable.
4mm crochet hook. If you are making this to go with the set that I am currently still making some patterns for then use that hook size. If you are just making it by itself and it doesn't matter what size monkey you get then feel free to use another hook size.
blunt end yarn needle for sewing
scissors
100% polyester stuffing
10mm buttons for eyes
3 pipe cleaners
Abbreviations:
st = stitch
sc = single crochet
BLO = back loops only
ch1 = chain one
sl st = slip stitch
2tog = crochet 2 stitches together
f/o = finish off
Many parts of this amigurumi begin with a magic ring. I have 2 short video tutorials that will show you 2 different methods of making a magic ring. Use the one that is
easiest for you. View 1st method here and 2nd method here.
How to read the rows:
Add a maker at the end of row 2 and move that marker each time you finish a row. Each row has a sequence. Example: 1sc then 2sc in next st means repeat that sequence 1sc then 2sc in next st followed by 1sc then 2sc in next st over and over to the end of that row. When you land on the marker you should be putting in 2sc. The number inside the parentheses ( ~ ) is the number of stitches you should have at the end of that particular row.
Click here for part 1 of the video tutorial which shows how to make all the parts. The video follows along with the order of the written pattern below except for the mouth which is shown last in the video.
Click here for part 2 of the video tutorial which shows how to sew the monkey together. For best results follow along in the same order that is shown in the video OR the order at the bottom of this post.
How to print the pattern,
Use the free service found here
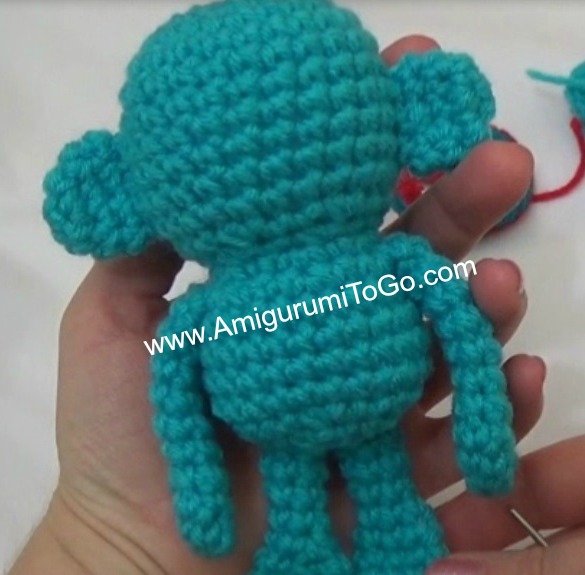
Head and Body: with turquoise
1) magic circle with 6sc (6)
2) 2sc in each st (12)
3) 1sc then 2sc in next st (18)
4) 1sc in next 2st then 2sc in next st (24)
5-11) 1sc in each st for 7 rows
12) 1sc in next 2st then 2tog (18)
13) 1sc then 2tog (12)
14) 1sc then 2sc in next st (18)
15) 1sc in next 2st then 2sc in next st (24)
16-19) 1sc in each st for 4 rows
20) 1sc in next 2st then 2tog (18)
stuff head
21) 1sc then 2tog (12)
Stuff body, make sure to stuff more into the head and neck area as needed.
22) 1sc in next 2st then 2tog (9)
f/o leaving a tail for sewing. Weave in and out of the remaining st and pull tight to close. Be sure to add in more stuffing as needed before you close the gap. Knot off and hide yarn tail in body.

Muzzle and Mouth:
Please feel free to change this part. You can use a felt patch instead, it doesn't have to be what I have here. I tried to keep the mouth simple. I was difficult finding a mouth to look right. After a few tries I decided to leave it as you see it. In part one of the video I show how to make the mouth last.
1) with red chain 7
2) starting with the 2nd ch from the hook, 1sc in each ch (6)
3) we will now work in the outer lops on the other side of the chain. Switch to body color in the first loop then put 1sc in the next 5 loops (12)
4) 2sc in first st then 1sc in next 5st then 2sc in the next st then sl st the next st and f/o leaving a tail for sewing. Try and make the sl st very tidy as it will be visible on the face. (14)

Ears: with body color
1) magic circle with 5sc (5)
2) 2sc in each st (10)
3) 1sc in each st for 1 row
4) 1sc in next 3st then 2tog (8)
sl st and f/o leaving a tail for sewing
Arms: with body color
1) magic circle with 6sc (6)
2) 1sc in next 2st then 2sc in next st (8)
3) 1sc in each st for 1 row
4) 1sc in next 2st then 2tog (6)
5-10) 1sc in each st for 6 rows
sl st next st and f/o leaving a long tail for sewing. Do not stuff arms
Legs: with body color
1) magic circle with 5sc (5)
2) 2sc in each st (10)
3-4) 1sc in each st for 2 rows
5) 1sc in next 3st then 2tog (8)
6) 1sc in next 2st then 2tog (6)
7-10) 1sc in each st for 4 rows
sl st next st and f/o leaving a long tail for sewing. Stuff with a pipe cleaner. Fold pipe cleaner and loop the end that goes into the foot, twist the straight ends and cut to length but leave a little extra at the top that can be pushed into the body when you sew the legs in place.

Tail: with body color
1) magic circle with 7sc (7)
2-12) 1sc in each st for 11 rows
sl st next st and f/o leaving a long tail for sewing. Stuff with a folded pipe cleaner. This will help your monkey stand on its own.
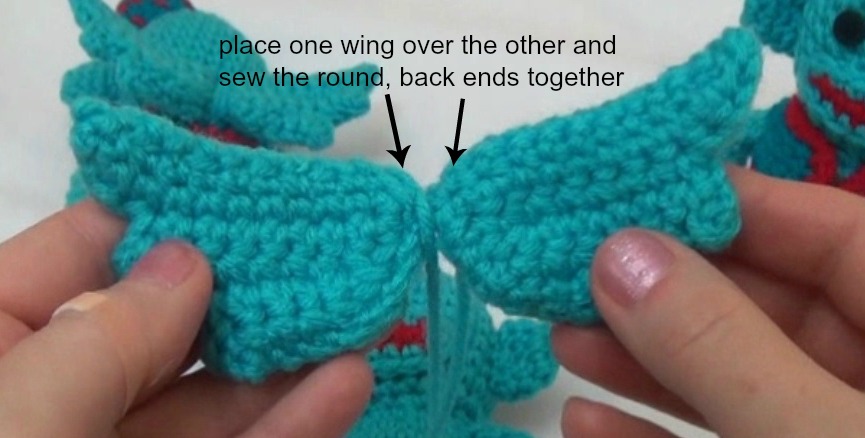
Wings: make 4 with body color
1) ch11 - begin with a long starting tail on 2 wings only in case you need them for sewing later
2) starting with the 2nd ch from the hook, 1sc in each ch (10)
3) ch1 and turn, 1sc in next 8st, ch3 and turn,
4) start in the 4th st from the hook, 1sc in next 6st then 2tog
5) ch1 and turn, 1sc in next 5st, ch3 and turn,
6) start in the 4th st from the hook, 1sc in next 3st then 2tog
working now along the edge to the left of your last st, you'll have to push your hook through, 2tog then 2tog then 1sc in the outer loop of the corner. Next, working along the outer loops of the row, 1sc in each of the 11 outer loops. f/o leaving a long tail for sewing. Weave this yarn tail back along the edge, pull the wing out straight if it got bunched up while weaving the yarn tail. Put 2 wings together and whip stitch along the outer edges. View part 1 of the video for best results.

Vest: with dark blue
1) ch23
2) starting with the 2nd ch from the hook, 1sc in each ch (22)
3) ch1 and turn, starting with 2nd st from the hook, 1sc in next 4st then ch4 and sc into 4th st from start of ch then (1sc in next st then 2sc in next st) repeat the sequence inside the ( and the ) 3 times. Then ch4 and sc into the 4th st from the start of the ch then 1sc in the next 4st (25)
4) ch1 and turn, 1sc in next 4st then 2sc in the next st (30)
f/o and weave in yarn tail or work the yarn tail into the next row.
5) we will now put a row of red all around the vest. View part 1 of the video tutorials if this part is confusing. Working now along the top edge first in each of the outer loops. Insert red yarn through the corner of the top of vest, on the side where you have 2 blue yarn tails, ch1 then 1sc in each of the loops across. When you get to the corner, ch1 and put 1sc into the next 3 spaces to the left. Once you reach the corner, ch1 and put a sc into each st across. When you get to the other corner, ch1 and put a sc into the next 3 spaces.
f/o leaving a tail for sewing. Weave the yarn tail into a st or 2 to the left and pull tight to even out the edge then weave it back over the other way. You will use this yarn tail to sew the vest closed once it's on the monkey. *Pictured below is the vest I made with a lighter blue that I used in the video tutorial.

Hat: with dark blue
1) magic circle with 6sc (6)
2) 2sc in each st (12)
3) working in the BLO 1sc in each st (12)
4) in both loops again, 1sc in next 5st then 2sc in next st (14)
5-6) 1sc in each st for 2 rows
sl st next st and f/o leaving a long tail for sewing. Using a strand of red, weave in and out around row 4, then put in a row of zig zags weaving in and out around the bottom edge. Knot of the 2 red yarn tails and tuck them inside the hat. The hat will be stuffed when you're ready to sew it on the head.
ASSEMBLY:
please follow same order as given. View part 2 of the video tutorials for best results
1) sew legs on. Pin them in place first to be sure you're leaving enough room for each leg.
2) sew arms on. They should be sewn one row below the neck, the 14th row as pictured
3) sew on ears. The top edge should be just below the 6th row
4) sew the muzzle on. The top of the muzzle should be on or about the 8th row.
5) sew the buttons on above the muzzle with about 3 stitch holes between them. In the video I sew the buttons on last but you can sew them on after you sew on the muzzle. They are sitting on the 6th and 7th row. Using a regular sewing needle with a small loop of thread to pull the yarn through the button holes. I show how to do this part in the video as well, at the very end of part 2.

7) put the vest on the monkey then sew the bottom halves of the vest together. Knot off and weave in yarn tail.
8) sew the tail on, it's just below the bottom edge of vest.
9) stuff and sew the hat in place. It should be just off to one side as pictured.


I hope you enjoyed the pattern!
Why donating is important and my thank you here.
Your flying monkeys are so funny. I think children will adore them.
ReplyDeleteHave a great weekend, Margaret
Hello! I've been working on a flying monkey for a Christmas gift for my aunt, and I just wanted to let you know, on the tail instructions I believe there is a typo! It says to 2sc in each st from rows 2-12, and in your video it says 1, which makes a whole lot more sense! The pattern is very easy to follow though and I'm glad you have a video tutorial for me to check back with in case I think I've done something wrong.
ReplyDeleteI'm very new to Crochet and this pattern is excellent because I've been working on it on my own, but in case I second guess myself I have your video tutorial to look back on! Thank you so much!
oh yes, thank you so much for letting me know. I've updated the pattern.
DeleteThank you so much for the kind words and I'm so happy you are enjoying the pattern.
Happy holidays!
I love taking your patterns and making them my own by modifications but the base pattern is yours, thanks so much, don't worry when I sell them I give you credit on my tags.
ReplyDelete